Technology for hybrid online YM

In the last two years we have been able to conduct YMs which are fully online, with fairly satisfactory results. This year is planned to be hybrid, allowing some pod (a group in one place) to join the Zoom meeting, which will consist mainly of individuals on screen.
Hybrid business meetings bring a new set of challenges, to enable the people in the group to have a good experience, as well as others in the meeting to have a good experience of the pods. If we don't get it right, someone in a pod will have trouble:
- Indicating that they wish to speak /minister
- Being acknowledged by the Clerk
- Being seen by people in other places
- Being heard by others
and therefore having a real sense of participation in the meeting. All of these challenges can be overcome, but it requires some set-up, some adherence to protocols and some Quaker discipline.
The following pages give the protocols and some technical advice. Please follow the protocols.
If you are joining in a group, it is important that the pod have a Pod Leader who can set up a little bit of extra equipment, and the furniture. We will be very happy to communicate with each Pod Leader, and support them to do this.
What kind of group are you planning to be?
Are you a:
Individual/Pair?
Small pod?
Large pod?
Hybrid meetings are different from what we have been doing. For example, raising an electronic hand, while necessary, will not identify the individual who wishes to speak. So we need something extra. A low-tech solution is for each person to have their name written on a piece of paper they can hold up below or alongside their face, for the clerking team to see.
Mostly, one camera will not see everyone in a pod, so we need some changed arrangements to help make sure that a person who is giving ministry in a meeting sits where the camera can see them, and the microphone can pick up their voice. We ask a person wishing to speak to move to a designated chair (with their name sheet).
Setup of the room a pod uses will need to be done carefully. More detail on that later.
Small pod
A single laptop does not service a group bigger than three people very well. Some expansion of equipment is recommended.
Here is a diagram of why a maximum small pod is three people.

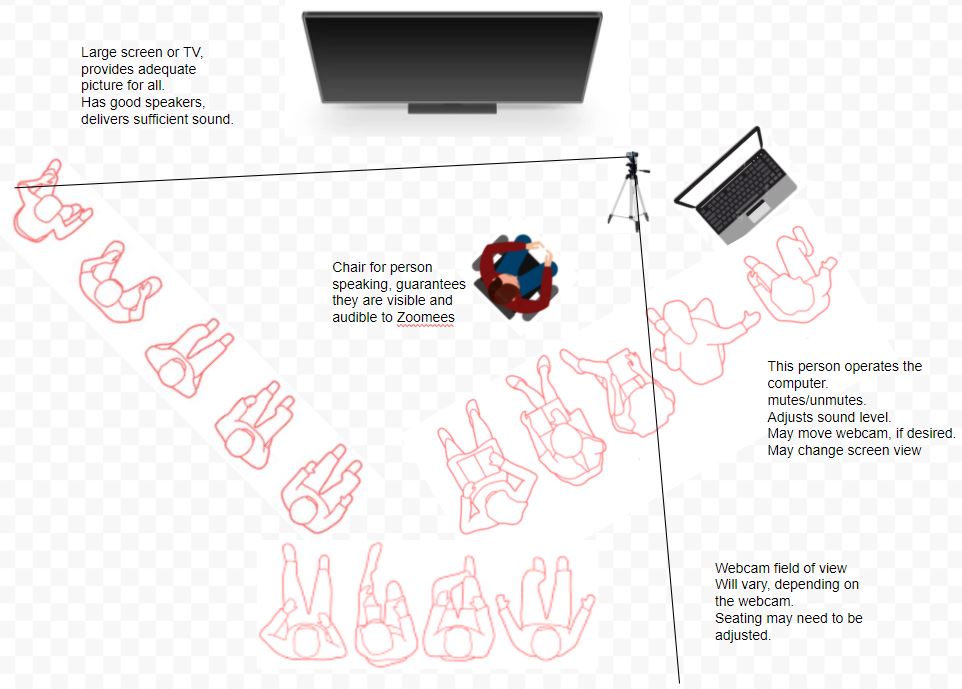
Large pod
Here is a large pod, showing some of the adaptations we need to make for it to be feasible.
Protocols for business meetings
The protocols and acceptable behaviours need to be different in a hybrid meeting (in which there may be a group of people on some devices) from meetings in which there is only one person (occasionally two) people on one Zoom screen. Here are some of the protocols we’ll ask you to follow, depending on how big the group you are in is.

Naming a group and each person
It is very helpful for the Clerk and others to be able to know who is in a group which is participating in a hybrid meeting.
It is important that the group name which is presented on-screen is accurate.
The Clerk likes to know the name of the person she will call to speak. So, as well as the group name, each person needs to be named. Prior to coming into the session, each person should make themself a half A4 page with their name written clearly on it. This can be held up under next to their face as they wait to be called, to enable the Clerk to identify them.
Indicating a wish to speak
Use of the Zoom Raise Hand facility is essential in a hybrid meeting. Physical hands can not be seen reliably by others in the meeting. It is important that in any group participating in the meeting, one person is able to raise and lower the electronic Hand for anyone in the group.
When a participant in the meeting uses Raise Hand, Zoom will relocate that image (group or person) to the top-left of the screen in Gallery View. Thus it is easy for the clerk to see the people who have Raised Hand and who wish to speak.
Using the Raised Hand tells the Clerk that someone wishes to speak. It does not tell who, within a group, wishes to speak. A further step is needed for the Clerk to know who that person is.
If you are part of a Large Pod, please note the need for the person wishing to speak to move into the focus chair, to be seen and heard well (as per diagram above).
Lost the need to speak?
If a participant changes their mind about speaking (someone else has spoken their mind, or their contribution has lost relevance), the Hand can be lowered, and the Zoom image returns to its earlier position, out of the queue. The withdrawing speaker returns to their previous chair.
Suitable equipment and setup for groups/pods
An individual or pair can sit at a laptop and participate well.
A small pod will benefit from a small investment (as below)
For a large pod, some purchase of equipment is essential. It’s important to attend to this well ahead of YM, to have the extra equipment, and become familiar with how to use it.
Some people will resist outlying some money. Please remember that the usual costs of YM (travel, accommodation, food) are removed or greatly reduced in this type of YM. any equipment purchased will continue to be useful for future online activities, eg Quaker webinars, committee meetings, etc.
For meetings in a circle
Such as a Meeting for Worship:
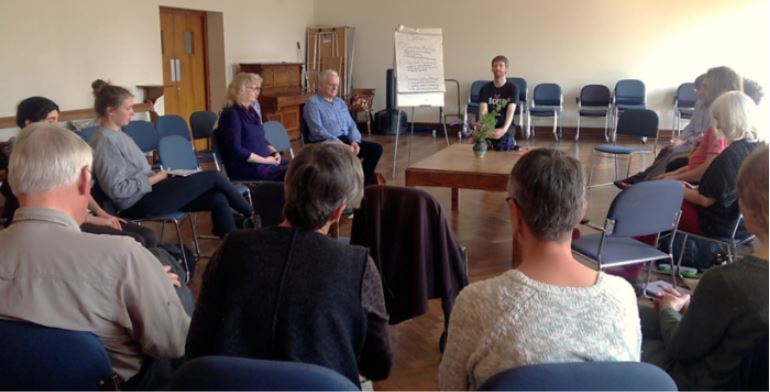
Large screen: it helps the people in the room to be able to see who is with them online. A (borrowed) large screen helps considerably. Position it, so that people in the room can see it; you may have to re-distribute seating a bit to accommodate it.
Camera: These present different challenges to include in a Zoom meeting. A wide-angle webcam will capture the pictures of some people, possibly not all. Re-pointing the camera can help, but you have to balance the intrusion into the meeting, and what is acceptable.
Microphone: Inevitably, the microphone (even a webcam) on its tripod will be widely varying distances from each participant, and so pick up their voice at widely varying volume. A microphone in the centre of the group is a good solution. It is a similar distance from each person. Oh, you might have multiple rows! That could be a bother.
Purchase a Blue Yeti microphone ($150-ish from Officeworks, etc.). It is a bit costly, but it does a great job. It has a pre-amplifier and Automatic Volume Control built in. (What are they?). An automatic volume control means the microphone adjusts its sensitivity so that, regardless of the volume of what it picks up, it send out a similar level of signal to other participants. Soft sound => it turns its gain up. We have found it works very well for people speaking up close, or 5 metres away from it.
Sit it on the table in the middle of the circle. A Blue Yeti plugs into a USB connector on your computer; no extra software needed. Works happily with Windows, Mac, etc. an extension cable is useful here (mind the safety of cords crossing the floor). Your Yeti can be useful for other purposes, too, eg recording an interview.
There may be cheaper versions that will also do a good job; can’t vouch for them.
Filming Testimonies--some advice
Filming Testimonies – Some Advice
Meeting online, we need to reduce some of steps which use a lot of time, to help us keep YM session briefer, and reduce our fatigue. One way of doing this, is that fewer of the testimonies to the lives of deceased Friends are read in sessions. The text is put on this website for Friends to read.
Some Meetings are attracted to the idea of making a video of the testimony being read and putting the video online. a link to the video is listed with the link to the text on the testimonies page. If you are interested in making such a video, the following are some tips for doing it well.
Background - When filming, it is best to have a simple background behind you. You don’t want a lot of mess or clutter, and you don’t want it to be busy and distracting from the person being filmed. A bookshelf is fine, but piles of paperwork can be distracting. It’s also better to have a lighter background than a darker one (white wall over black curtains for example).
Type of shot – In this case, you want to use what is called a “mid-shot”. This means that the person in the frame is seen from about somewhere along their torso, to the top of their head – with a little ‘space’ above.
Lighting – Lighting for a video can be complicated, but here are the key points to remember. You want most of the light (whether from a window or lamp) behind the camera. You also want some light coming from behind the person being filmed, but not shining directly into the camera. This could just be the downlights in the space you’re filming in, or you put a lamp behind.
What to film on: You can film on a camera with video capabilities, a smartphone, or a webcam on a computer.
Camera: Photography cameras can be a range of qualities. If you are using a camera, see your owner’s manual about the best setting to film a video with. It is best practice to attach a camera to a tripod when filming, so you can point accurately and steadily.
Webcam: Like photography cameras, webcams can have various qualities. It will likely be set up with the right type of framing/shot if you have used it for Zoom meetings. If your computer has a built-in webcam, you may be able to set that up suitably to use it. There will probably be a ‘Camera’ program which will let you film. If not, you can download the Zoom app and make a free account. Though designed for educators, this video is a good guide on how to film yourself on Zoom: https://www.youtube.com/watch?v=4BXjQ4x-H1s
Please note, we do not want to screenshare or have any other participants in the meeting when filming Testimonies.
Phone: The camera on your smartphone will probably be of high quality. You will need to position it as vertical as possible. If you have a compatible stand or tripod you should use that. Otherwise, books stacked on a table can work. When recording, just use the ‘video’ function in the camera app.
Quality – You want the video file to be of a decent resolution. The video should be at least 480×272 pixels.
Sound – The closer you are to your microphone, the better the sound quality will be (but you don’t want to be so close you can eat the microphone!). If you do not have an external microphone, do not worry. The microphone built-in to your phone or computer–that you use for Zoom - should be fine. Make sure there is minimal background noise when you are filming.
Testing – Before you film, do a test run. This can just be a minute of you talking, or of reading through part of the Testimony. Ensure that you are speaking as loud and clearly as you plan to when filming properly. Once you’ve stopped the test, watch and listen back. If the volume is too soft, or the video is dark, make adjustments as necessary.
Filming – When filming, wait 2-3 seconds and then read the testimony as if you were reading it at a formal session. There is no need to add anything else to the video.
When you have completed the video, please contact Michael Searle (cymOrganising@QuakersAustralia.info) to arrange for posting it to make it available to others.